Editing Questions
You can edit one question at a time, or multiple questions at once.
To edit one question, click the edit icon (![]() ) at the
right of the question you want to edit.
) at the
right of the question you want to edit.
To edit multiple questions at once, put a tick in the tick boxes at left of each question you want to edit, and click the Edit button. You can select all the questions on the page by clicking Select All link.
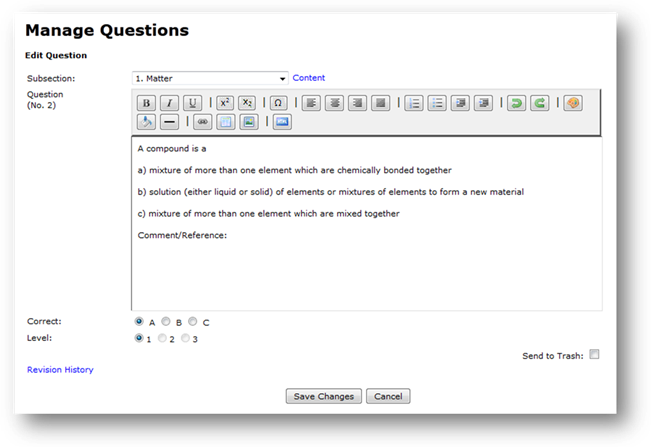
The Edit Questions uses a toolbar, which enables the following text formatting:
· Bold,
· Italic,
· Underline,
· Superscript,
· Subscript,
· Justification,
· Bullet and Number Listing,
· Indentation,
· Colour,
· Hilite,
· Tables
The toolbar also enables the insertion of:
· Greek and other special characters
· images/diagrams
· hyperlinks
· Rule Line.
The toolbar also allows viewing and editing of the raw underlying code behind the formatting, in HTML. A Redo and Undo button is also available to reverse or cancel any changes made. Pressing ctrl-Z on your keyboard will also undo the last action carried out.
It is important that the question structure is not altered when editing. You can edit only the text of the question stem and/or the answers. Do not edit, alter or delete the a), b) or c) or the Comment/Reference labels.
The question can be reassigned to a different subsection within the same module. Select the new subsection from the subsection dropdown option. Hover over the Subsection Content link to view the subsection’s contents.
The correct answer (a, b or c) can be assigned or reassigned.
The question Level (1, 2, or 3) can be assigned or reassigned. Only the Levels which are specified in the EASA Part-66 Syllabus are allowed options. If only one Level is specified in the EASA Part-66 Syllabus, that Level is selected by default and cannot be changed without changing the subsection.
You can select to Trash the question by putting a tick in the Trash Question tick box.
Click the Revision History link to record details of any changes you have made to the question. In the Revision History popup, you can type the details of the change in the text box, and click submit to store the details. It will automatically record the date and name of the administrator making the change. You can also read the previous changes that have been made to the question.
When you have made all the changes that you want to make to the question, click Save Changes, and you will return to the Manage Questions page. If the question had already been approved, the Revision History popup will appear, and you will be required to enter the details of the changes you have made to the question before closing it. The question will then return to being a Green, unapproved questions and will be withdrawn from use in any future exam generation, until another Level 2 or Level 1 administrator has logged in and Approved the changes to the question.
If you choose to edit multiple questions at once, no toolbar
will be included. However, this is a
quick and convenient way to make simple text changes, check and assign/re-assign
Levels, add Comments/References etc. If
you require the toolbar at any time whilst editing multiple questions at once, for
example, to add a diagram/special character or format text, you can click the Edit with Toolbar editor link to switch to the single question editor with
toolbar.
Related Topics
Copyright (c) 2012 Total Training Support Ltd